Logo
ARROW B2BContact Us

DIY: PLANTER WITH TRELLIS

By JEN WOODHOUSE


GETTING STARTED

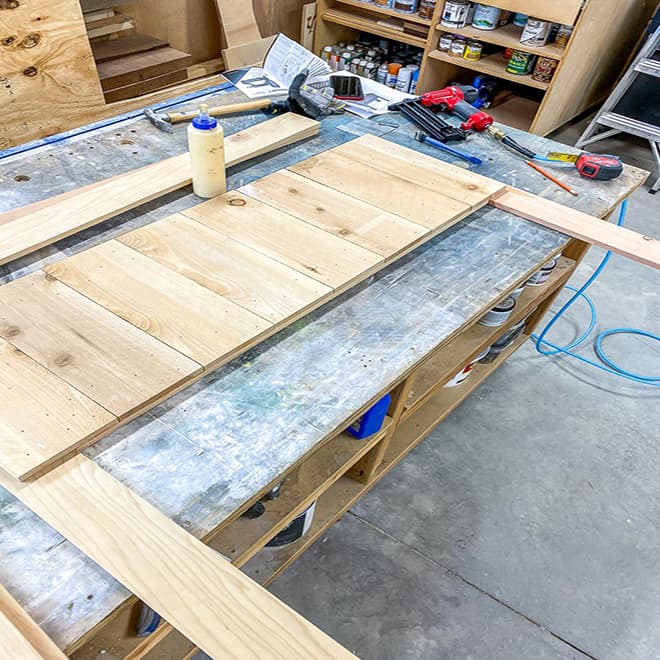
Calling all green thumbs! This easy and affordable DIY planter box with trellis project is the perfect way to bring your yard back to life. For this weekend project, all you need is an Arrow pneumatic brad nailer, an Arrow compact electric stapler, some tools and saws, and around $50 worth of materials.

YOU WILL NEED

PT18G

Pneumatic Brad Nailer

T50ACD

Compact Electric Staple Gun

Other Tools

Tape measure

Pencil

Speed square

Cordless drill/driver

Compound miter saw

Table saw

Pocket hole jig

Safety glasses

Hearing protection

Dust mask

Circular saw or jig saw (optional)

Materials

1" and 1 1/4" Arrow brad nails

(12) 1" x 6" x 6' cedar fence pickets

4' x 8' lattice panel

2" x 2" x 8' board

(4) 1" x 4" x 8' pressure-treated boards

2 1/2" and 1 1/4" wood screws

1 1/4" pocket screws

Wood glue

Landscape fabric

START BUILDING

STEP 1

For a detailed project plan and full cut list, visit Jen Woodhouse’s blog here.


Front and back panels

First, use the miter saw to cut the legs, long rails, and planks to length from the cedar fence pickets. Then run the leg and rail parts through the table saw, ripping them down to 3 ½” wide. The planks will remain at the original width.


Lengths

Legs: (4) 1″ x 3 ½” at 32″ length

Long rails: (4) 1″ x 3 ½” at 38 ¼” length

Planks: (16) 1″ x 6″ at 14″ length

STEP 2

Sometimes cedar fence pickets have a smooth side and a rough side. If this is the case, lay the smooth side down so that the rough side will be on the inside of the planter. Pro tip: lay the legs and rails down on a workbench, with the smooth side facing down, then position the planks on top of them, leaving a ⅝” inset on each end. Use wood glue first on the placed planks, then reinforce them with your PT18 pneumatic brad nailer and 1″ brad nails.


Repeat and build two of these panels, which will be the front and back panels of the planter. Set those aside and move on to building the side panels.

STEP 3

Side panels

Cut the legs, short rails, and planks to length from the cedar fence pickets. Rip the rails down to 3 ½”, just like you did for the front and back panels. However, this time, you’ll rip the legs down to 2 ⅞”. Construct the side panels in the same way you did the front and back panels – by laying the legs and rails in position, then attaching the planks with wood glue and 1″ brad nails. There will also be a ⅝” inset on both ends.


Lengths

Legs: (4) 1″ x 2 ⅞” at 32″ length

Short rails: (4) 1″ x 3 ½” at 12″ length

Planks: (6) 1″ x 6″ at 14″ length

Once all four panels are constructed, they should come together like a puzzle. Secure at each corner with wood glue and 1 ¼” brad nails.


STEP 4

Next, create your cleats by cutting down the 2″ x 2″ board to two lengths at 42 ¾” long. Then attach the cleats to the inside of the planter box – this will support the bottom slats. You can place the cleats at any height in the planter. We’re no gardening experts, but a good rule of (green) thumb is to leave at least 8″ for soil for your plants. (We placed the cleats about 12″ down from the top of the planter.)


Then measure, mark, and cut the slats to 16 ½” long. Lay them inside the planter box on the cleats and secure with wood glue and 1 ¼” brad nails. The spacing doesn’t need to be exact here – just allow for some space for proper drainage.


STEP 5

To add the trim, rip two of the pickets down to 1 ½” wide, then measure and miter the ends at 45°. It’s best to “sneak up on the cut” here, so that you get the tightest fit. We usually cut the boards long and then shave off a little at a time until the miter joints are tight. Finally, attach the trim with wood glue and brad nails.


Lengths

Short trim: (2) 1″ x 1 ½” at 19 ¼”, mitered ends

Long trim: (2) 1″ x 1 ½” at 45 ¾”, mitered ends

STEP 6

Now that the planter is complete, let’s move on to building the trellis. Measure, mark, and cut the pressure-treated 1″ x 4″ boards to length.


Length

Trellis legs: (2) 1″ x 4″ at 96″

Trellis rails: (4) 1″ x 4″ at 38 ¼”

When constructing the frame, use a pocket hole jig and 1 ¼” pocket screws to connect the trellis rails to the trellis legs.

STEP 7A

To assemble the trellis, lay the lattice down on top of the constructed frame and secure it with 1″ brad nails. If you don’t want to see the excess lattice under the planters, you have the option of using a cordless circular saw or jig saw to cut the excess from the bottom.


Next, attach the trellis to the back of the planter by driving 1 ¼” wood screws in through the back. Once the trellis is attached, carry the planters outside and set them in place, making sure they are completely level.

STEP 7B

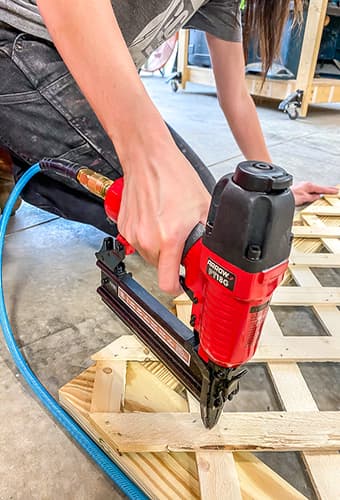
Finally, line the inside of the planters with landscape fabric and use the Arrow T50ACD compact electric staple gun to attach it.
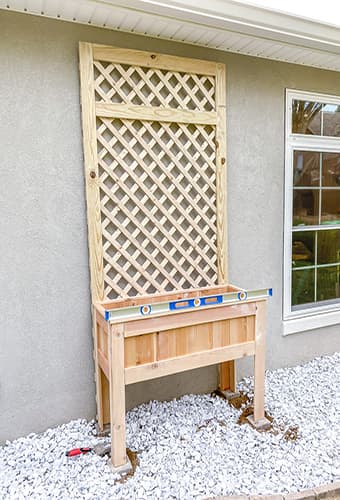
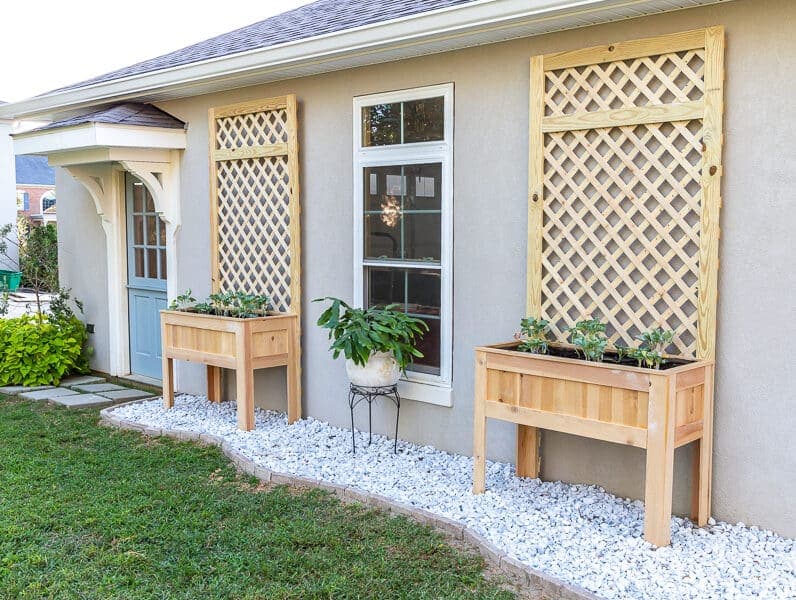


STEP 9

Once the framed pegboard is securely in place, it’s time to decorate! Additional pegboard hooks can be purchased from home improvement stores or online. This is the perfect time to put your own special touch on the project.

FINISHED PRODUCT

We love how this project can add visual interest to an otherwise blank wall. What will you grow in your new planters? Sunflowers? Summer veggies? Let us know!


We’d love to see how your DIY trellis planters turned out! Share your work with us on Facebook and Instagram by tagging @ArrowFastener or using #MadeWithArrow.


ABOUT THE AUTHOR


Jen Woodhouse

A self-taught carpenter with a fearless DIY spirit and a penchant for problem-solving, Jen Woodhouse offers in-depth tutorials that inspire and encourage readers to build their way to a more beautiful home. Follow Jen at @jenwoodhouse on Instagram.

WANT TO BE A FEATURED ARROW BLOGGER?

We’d love to hear from you! If you would like to be an Arrow Project Partner and contribute future posts here, contact us at

projects@arrowfastener.com

We look forward to hearing from you!