

%2520(1).jpg&w=3840&q=75)
.jpg&w=3840&q=75)
%2520(1).jpg&w=3840&q=75)


GETTING STARTED
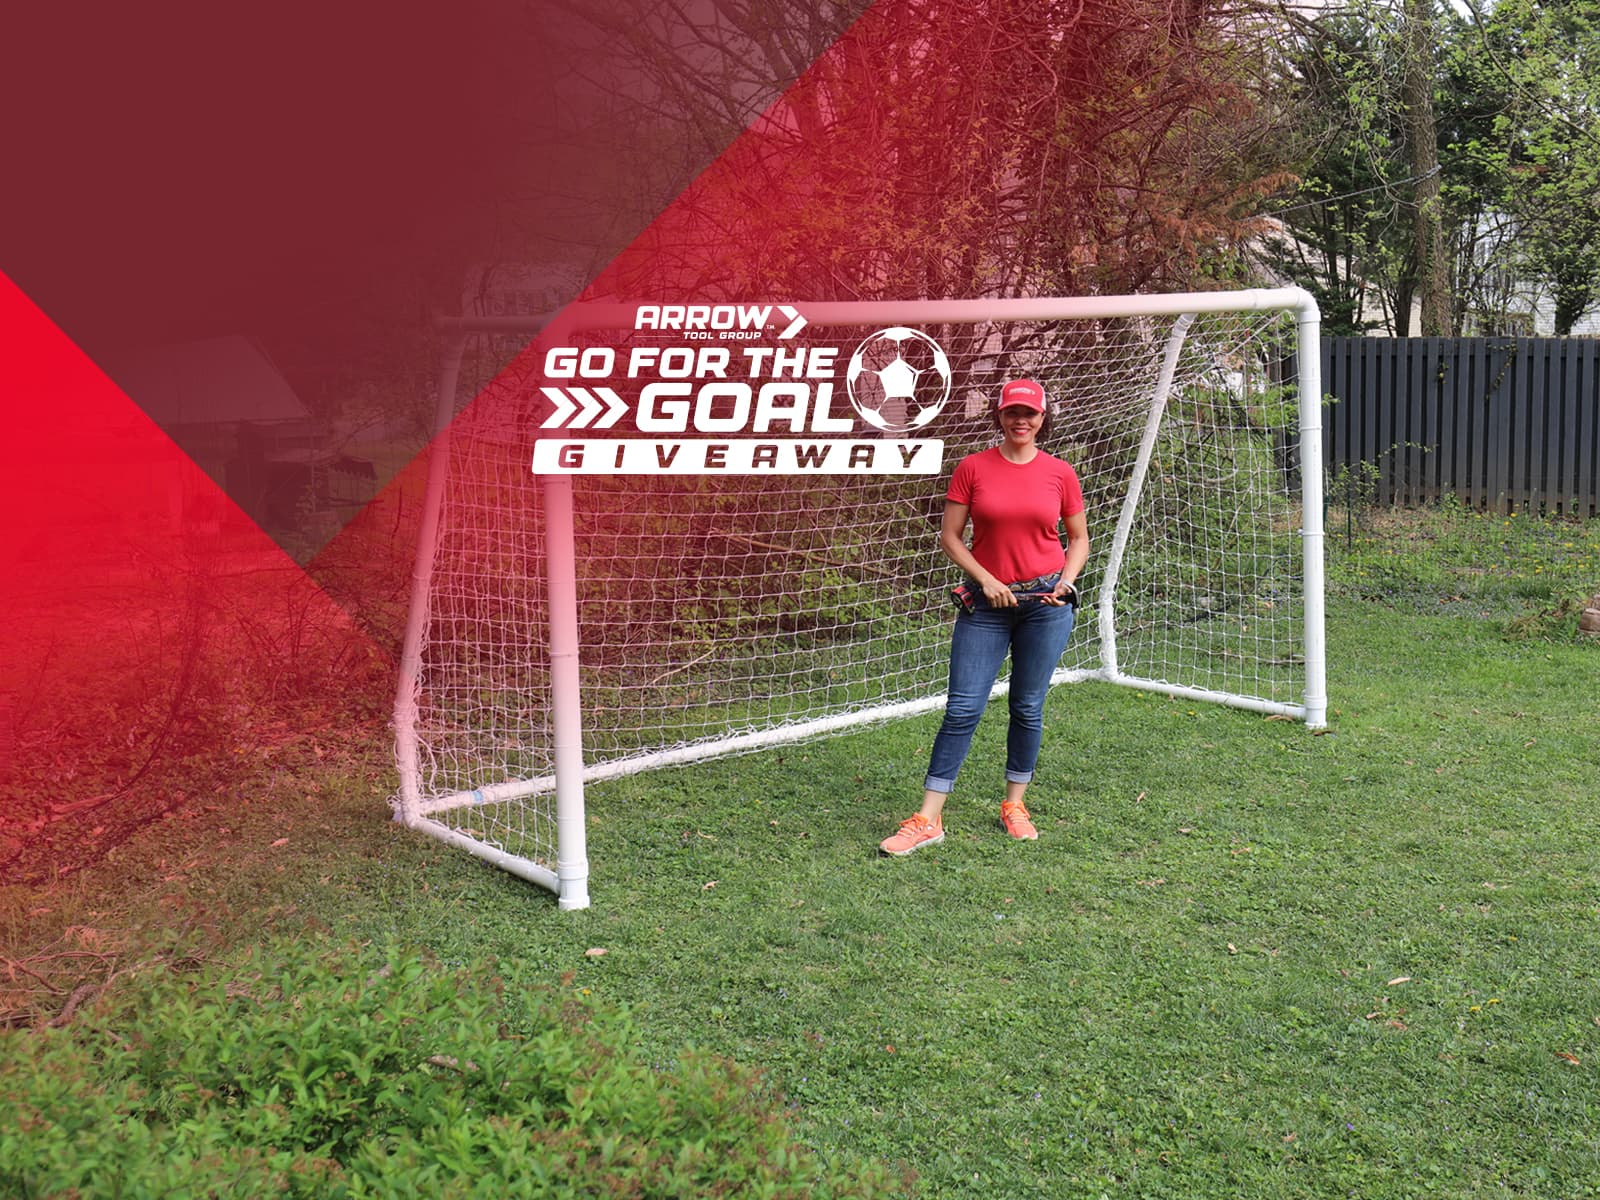
This soccer rebounder is sponsored by Arrow Tool Group and created by Serena Appiah of Thrift Diving.
My 14-year-old son is an avid soccer player, with soccer practices three times per week. He lives and breathes soccer seven days a week, though! With an ample backyard, I wanted to make him a backyard soccer goal, with two rebounders, so that he can take his training to the next level on days when he doesn't have practice with his football club.
I teamed up with Arrow for this project because the entire family is excited about the upcoming Big Game, too! What better way to turn your own yard into a training field for your soccer player!
Be sure to check out Build Your Own Soccer Goal for step-by-step instructions on how to make your own soccer goal. And keep reading for making a couple of rebounders, too!
YOU WILL NEED
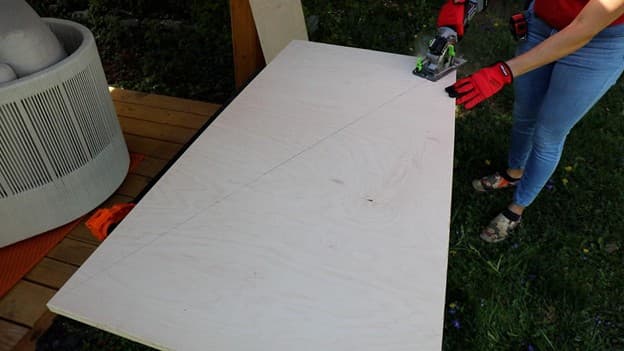
STEP 2: Cut a Diagonal Line
One of those pieces of plywood will be marked and cut at a diagonal, which will form the sides or "wings" of the soccer rebounder. Use a small circular saw (I love this one by WORK PRO), to cut.
STEP 9
Once the framed pegboard is securely in place, it’s time to decorate! Additional pegboard hooks can be purchased from home improvement stores or online. This is the perfect time to put your own special touch on the project.
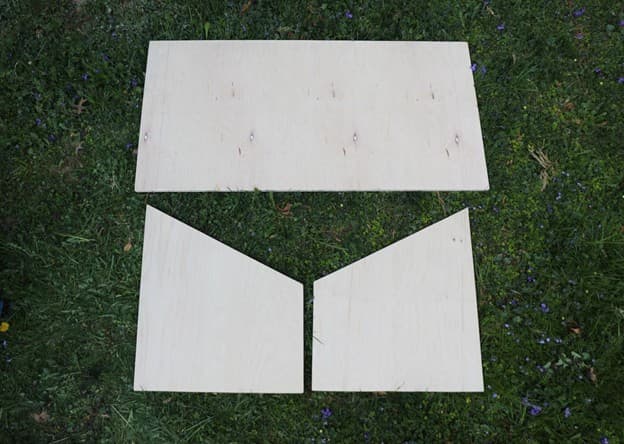
You'll get two triangles that will form the sides, or "wings" of the rebounders.
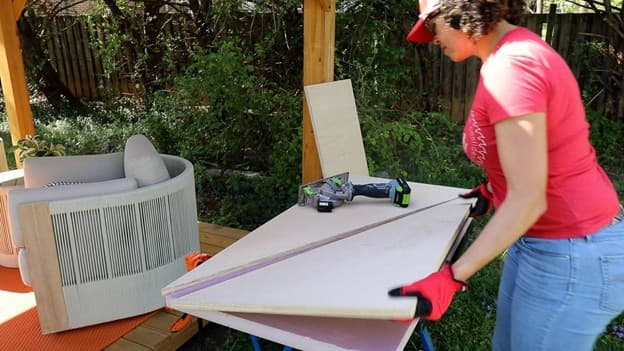
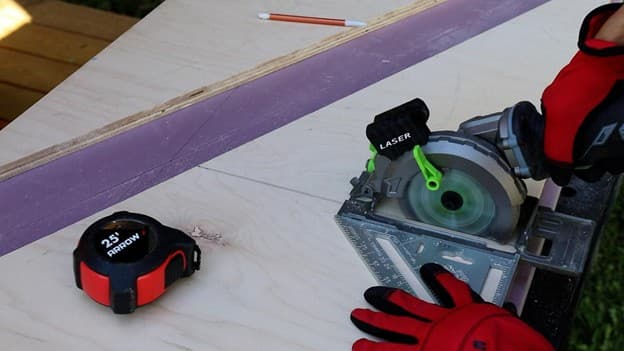
STEP 3: Trim Ends of the Triangular Sides
On each triangular, measure about 21" over from each side and mark perpendicular lines, then cut off each sharp edge of the triangle.
Once cut, you should be left with two side pieces as shown below, along with the other piece of plywood, which will serve as the front of the soccer rebounder.
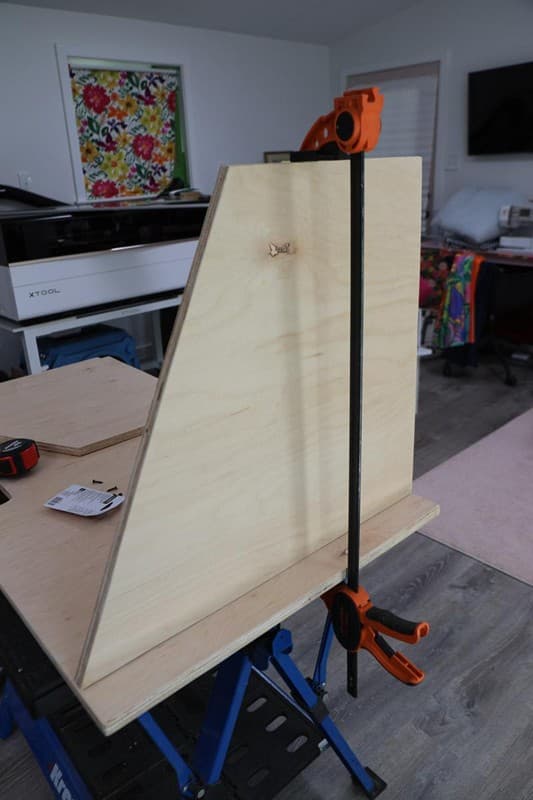
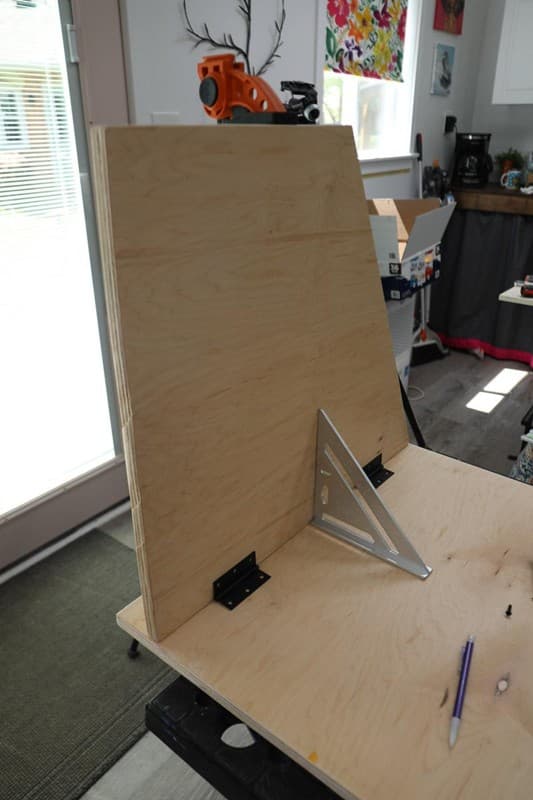
STEP 4: Attach the Sides to the Board
Measure in about 3" from each side of the front board and mark. Use a Pony clamp to hold the side in place. Use a square to ensure the side is at a right angle.
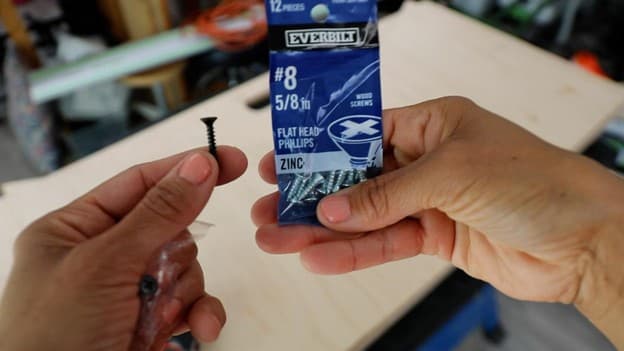
You'll see that the enclosed screws that come with the clasp are a bit too long, so the 5/8" are perfect.
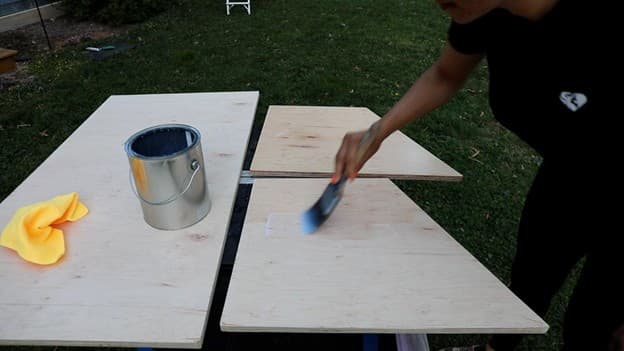
STEP 7: Sand it Smooth, Then Add a Top Coat
Using a top coat isn't required, but there's something beautiful about a water-based top coat on bare plywood. It gives the wood warmth, and once dried and sanded lightly with very find sandpaper, it feels really smooth.
It makes the rebounder look and feel upscale (especially if it's a gift you'll be making and giving away to your favorite soccer player!).
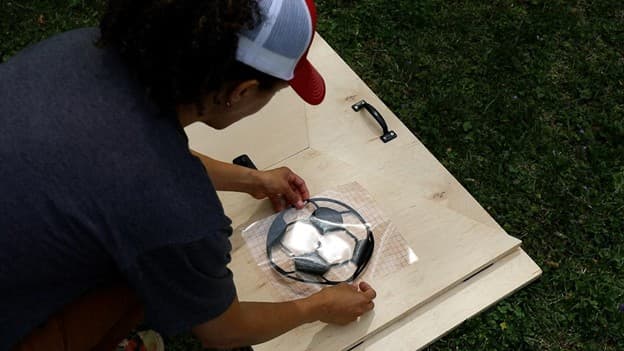
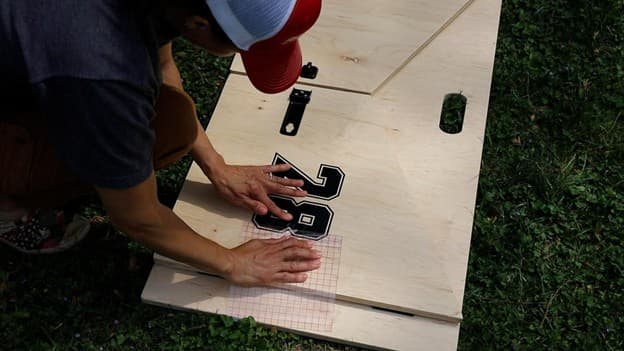
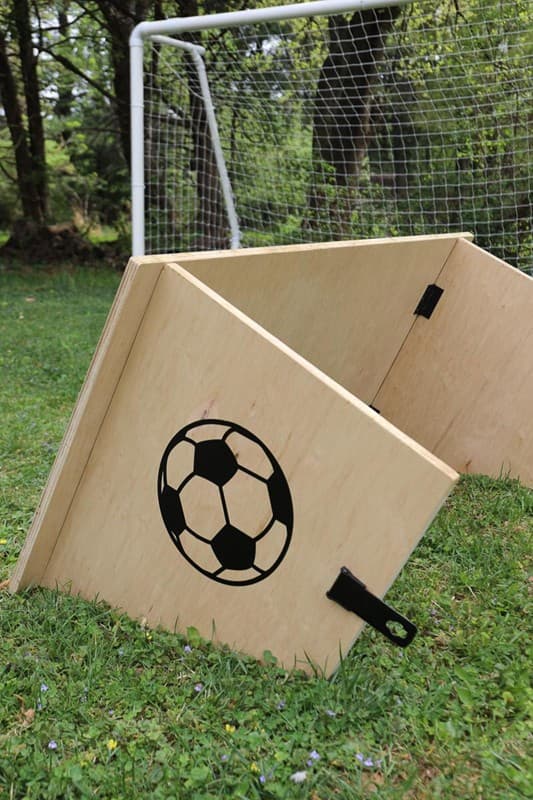
STEP 8: Decorate Your Rebounder
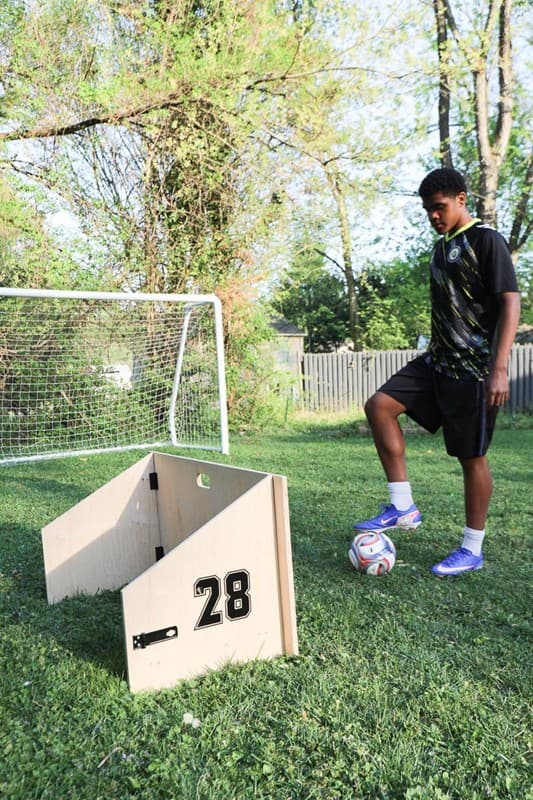
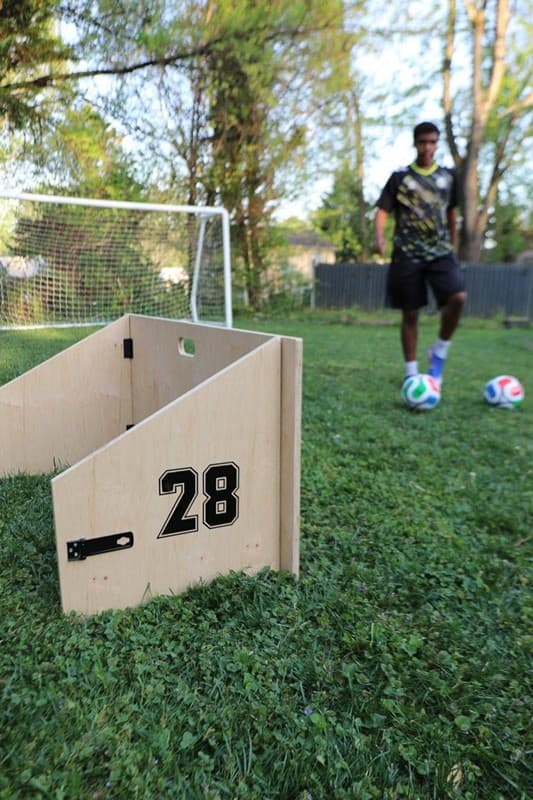
Who doesn't love personalized things?! I used my vinyl cutter to cut out a soccer ball to attach to one of the rebounders, and for the other one, I cut out permanent vinyl with my son's soccer jersey number #28.
Every day when my son gets home from school, he changes into his cleats and starts practicing his strikes and foot work. It makes me happy to know that he's getting so much use out of these!
Watching my son's games is the highlight of my weekends. I've become a soccer fan because of him! Knowing that the BIG GAME is coming soon is so exciting!
Do you love soccer as much as we do? Are you ready for the big game?
Enter to Win!
We've teamed up with Arrow for the "Go for the Goal" Giveaway! Three lucky winners who enter between April 22, 2026 and May 6, 2006 will be entered to win an Arrow Tool Group tool kit with some of the tools used to make the backyard soccer goal and rebounders, including a $500 gift card so you can get all the materials you need to get this project done before the big game!
ABOUT THE AUTHOR
Serena Appiah
Serena Appiah is the owner, publisher, and artist behind Thrift Diving, a blog that inspires home enthusiasts to decorate, improve, and maintain their home on a do-it-yourself budget. Her mission is to inspire people to be creative and to gain the confidence, motivation, and skills they need to not just start a project, but to finish it using paint, power tools, and thrift stores.
WANT TO BE A FEATURED ARROW BLOGGER?
We’d love to hear from you! If you would like to be an Arrow Project
Partner and contribute future posts here, contact us at projects@arrowfastener.com
We look forward to hearing from you!
Arrow 20 Oz. General Purpose Steel Claw Hammer
Arrow Self-Lock Tape Measure, 16ft Reach
Arrow 14-in-1 Ratcheting Multi-bit Screwdriver
Other Tools
Pony Jorgensen clamps
Speed square
Table or 2" thick foam for cutting surface
Hot glue gun (optional)
You'll also need some WORKPRO tools for cutting the PVC and wood for rebounders, along with a power drill if you don't have a screwdriver:
Handheld saw
Jigsaw with scroll blade (optional)
Power drill with driving and drilling bits
Materials
3/4" sheet of 4'x8' plywood
PVC cement
Pack of 5/8" size 8 screws
Clasp
4 hinges with 5/8" screws
Medium grit and fine sandpaper
4" heavy duty handle (optional) with 5/8 screws
Top coat (optional)
Paint, stencils, hot glue (optional)
START BUILDING
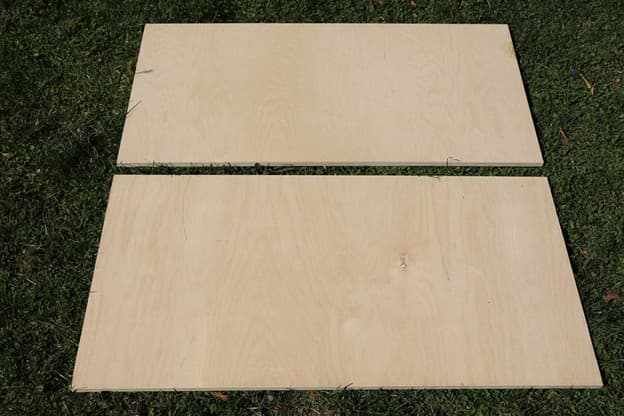
STEP 1: Cut a Sheet of 4'x8' Plywood into 4 Pieces
Rebounders can be expensive. Buying a sheet of 4'x 8' plywood (3/4" thick) allows you to make two wooden soccer rebounders for your yard for a fraction of what buying two rebounders would cost.
When buying wood from the hardware store, have them cut a full sheet into four quarters. You'll need two piece (24" x 48" each) for each rebounder. It also makes transporting the wood home much easier, as well!
Place two hinges about 3.5" from the top and bottom of the board. Screw in place using a screw driver or a power drill.
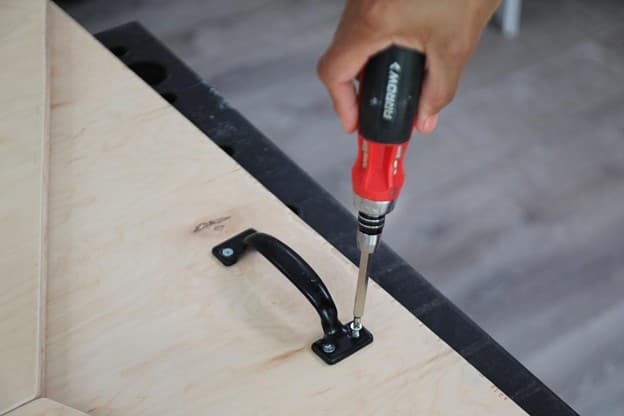
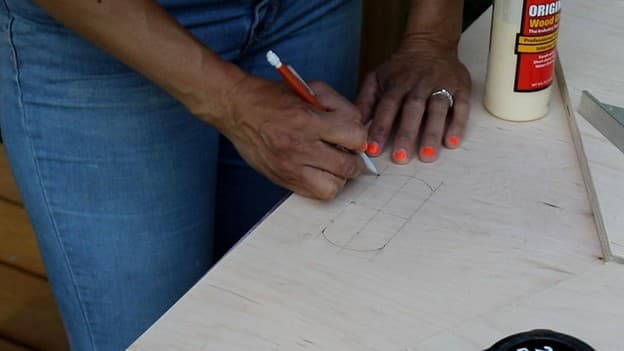
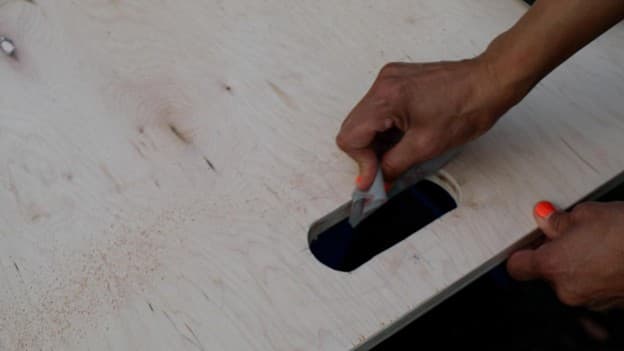
STEP 5: Cut or Attach the Handle
The fastest and easiest method of creating a handle is by screwing on a 4" heavy duty handle on the back top of the rebounder, about 2" down.
But you can also mark for a handle to be cut out using a jigsaw, as shown below.
Sand the handle cut-out smooth with sandpaper.
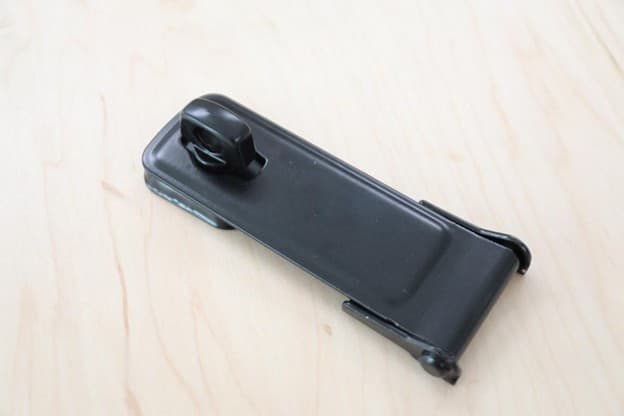
STEP 6: Attach the Clasp
When carrying or moving the rebounders, you'll want the sides to remain closed. Use a 4" clasp, secure it the edges of the sides. The screws that come with the clasp may be a bit long, so have some 5/8" screws on hand so they don't go all the way through the 3/4" plywood.
FINISHED PRODUCT